
Here is what my armoire looked like before (this is not my actual armoire but one very similar to it):


Basic steps of this process were similar my nightstand makeover from awhile ago. I was a little more careful with the sanding step on this piece though because it is laminate.
Other supplies that I used for this project were:
1. moulding frames bought on clearance at Lowes
2. paintable textured wall paper from Amazon
3. Liquid Nails adhesive for small indoor projects
4. Martha Stewart Living Metallic Paint in Vintage Gold from Home Depot.
5. Spray adhesive from Hobby Lobby
6. Paintable clear caulk
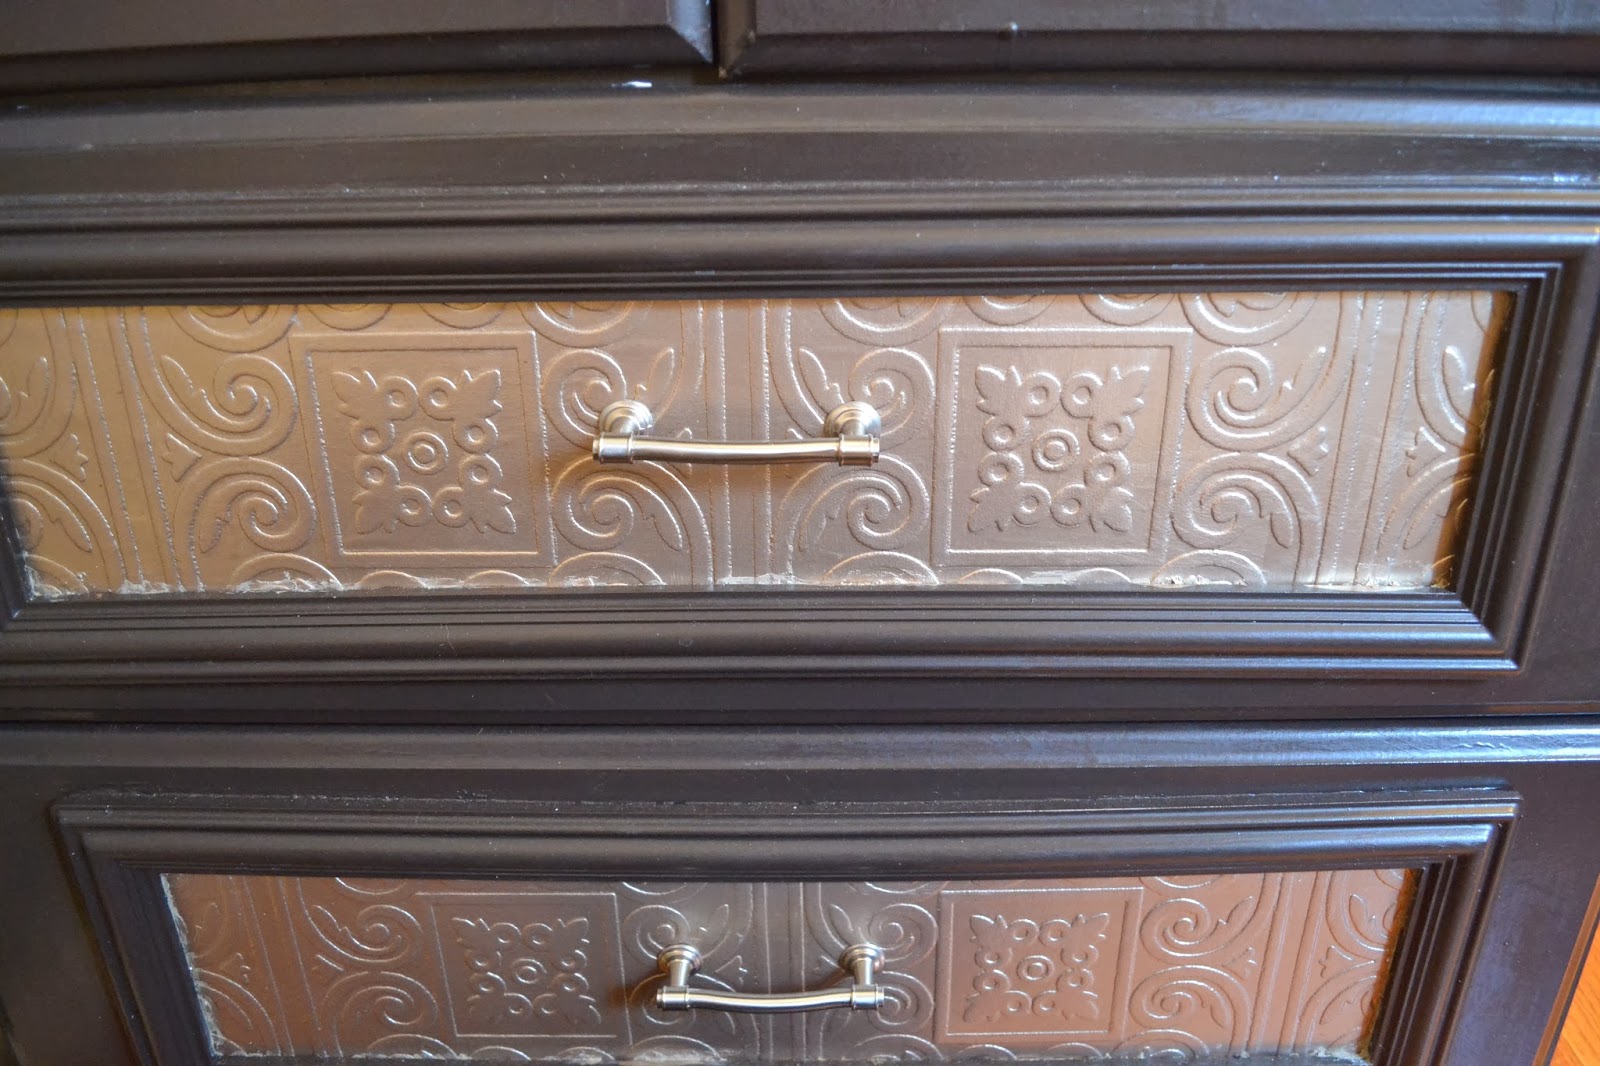
After I had painted the whole piece I cut the wallpaper to the dimensions of the inside back of the part with the doors. I put it on using spray adhesive. I then painted it with 2 coats of the Martha Stewart Vintage Gold Paint.
For the panels on the doors and drawers, I did some calculation to make sure they were centered, cut the wallpaper pieces to the size of the frames and glued them on using the spray adhesive. I then painted them with two coats of the Vintage Gold paint. I painted the moulding frames and once they were dry I put a line of Liquid Nails all around the frames and attached them to the doors and drawers. After the Liquid Nails was dry, I caulked around the frames to fill in any gaps. After the caulk was dry I touched up the paint. The last step was applying the layers of polyacrylic just like the nightstands.
This project took forever. I think I worked on it for a month off and on. I forgot to take a pic of the inside but it looks pretty neat with the wallpaper. I am super excited by how it turned out. It is now such a unique piece of furniture that ties in perfectly with the other pieces in the room.
The second piece of furniture that I made over was my husband's dresser. You can see it in this terrible photo from our rental house.

It was also a very generic piece of laminate furniture that he has had since college. I did a very simple makeover on this one since it is my husband's and just painted it and added knobs that match the nightstands.


It is super simple but chic. The color reads a little darker in person. I think that it looks fantastic with the newly painted Ralph Lauren Washboard walls. Also, you can see the few pieces of quarter round that have been installed in these pictures. I am still waiting for the rest of the quarter round to come in. It was supposed to be here by the 16th of November so I am a little annoyed with Lowes right now.
The room is coming together but there is still so much to do including installing the curtain rod, making curtains, finding new bedding for the bed, etc. Hopefully it won't take me so long to write another post but I can't guarantee it since December is such a busy month for music teachers. Until next time here is a look at the furniture makeovers in this room.
