Monday, July 29, 2013

Tiled Kitchen Backsplash

I am very excited to be sharing my finished kitchen backsplash on the blog today.  I am also extremely relieved that this project is done.  I bought the tiles quite a few months ago and they have sat on the dining room floor for what seems like forever.  It took me a long time to get up the nerve to install it because I felt like I had no idea what I was doing.  It turned out to not be so hard but it took a while to complete which is also why I am relieved that it is done.  The pictures can't even begin to capture how awesome it looks in person and I am completely in love with it.  I can't believe that I did this!

This is not a tutorial because I am not a professional but I thought I would include some videos and links that aided my completion of this project.  This tile was a little difficult to work with because of its unique shape and I felt a little in over my head since this was my first (and maybe last) tiling project.  I did find two posts from other blogs where the writers ahd installed similar tile in their homes found here and here.  I cut most of the tiles by hand using a score and snap handheld tool and tile nippers.  Some of the tiles around the outlets needed more complex cuts which I had my husband cut with a portable wet tile saw.  In order to make sure his fingers were safe from being cut a tool called the Tilesizer was a necessity
I bought one on Home Depot's website.  I am also including two videos that were helpful.  The first one is helpful in learning how to grout and the second one explains how to extend electrical outlets out after you are done tiling.  That posed a little bit of a problem for me since one switch that seems to have no purpose in our kitchen kept giving me a voltage reading on my voltage tester (an absolute necessity so that you don't get electrocuted).  It turns out that the switch is labeled disp. on the electrical panel.  We don't have a garbage disposal in our sink.  I'm not sure why electricity needs to be running through a switch that isn't actually wired to anything, go figure.
There are other videos in this series that show other steps in the tiling process too.

Here are some more images of the completed backsplash:


 And here is a comparison of the kitchen with and without backsplash:
It's a big difference!

Monday, July 22, 2013

Things I Can Actually Sew


This past Saturday was my birthday which means that I have now had my sewing machine for 1 year.  It has definitely been well used over the past year and while I am by no means an expert seamstress now I have successfully completed many projects.  You may remember my very first sewing project, this camera purse.  I think it was a difficult project to begin with but while it is nowhere near perfect it protects my camera and I have used it numerous times.

Today's post is a round up of simple sewing tutorials that would be good for a novice sewer like me.  These are all tutorials that I have found through Pinterest and I have tried out myself.  The images are all of my own creations and I have included links to each of the tutorials if you would like to give them a try yourself.

1. Burp Cloths


A long time ago I pinned a collection of tutorials for making diy baby gifts.  One of the tutorials included was this tutorial for these cute burp cloths from Made.  I am always buying fabric quarters at Joann so I used those for the top layer.  I ordered a bunch of chenille from Fabric.com for the other layer.  These were so simple and made a cute gift for my sister-in-law who just had her second child.  I will definitely be make more sets of these to give as gifts in the future.

2. Lined Curtains

You can find the link to the tutorial for these curtain in this post from last November.  That post includes pictures of the curtains I made for the living room.  I made 6 panels for my living room and 4 for my dining room using this method.  They are super easy to make but require a lot of ironing.  The dining room curtains were slightly more difficult because of the fabric that I used (a sateen fabric made to look like Dupioni silk).

3. Maxi Skirt

I love the look of maxi skirts especially for summer but I had never purchased one for myself before.  When I saw this tutorial by The Winthrop Chronicles I knew that I had to make one.  I was even more convinced when I discovered all the cute knit fabric that can be purchased from Girl Charlee Fabrics.  I have worn it many times already and have gotten so many compliments.  I love it!

 4. Infinity Scarf

So I may have gone a little overboard with the ordering of chevron knit fabric at Girl Charlee Fabrics but that's okay because I can now make lots of infinity scarves.  I foresee making lots of them for gifts, so friends beware.  I used this tutorial from Sea Glass and Ribbons.  This was seriously the simplest sewing project in the world.  Anyone could do this and it only takes about 10 minutes or so to complete.

Well since this is a post on sewing I thought I would include an updated photo of the porch that includes the new curtains.
These curtains are made of outdoor voile and I didn't line them because I wanted them to be light and airy.  The porch is coming along.  I have been gathering all kinds of ideas for decor and art for this space and I hope to share them with you soon.  Lately my focus has been on the kitchen backsplash which is finally nearing its end.  I can't wait to share the finished project with you!

Monday, July 15, 2013

Mounting Photos on Canvas and a Reusable Running Training Schedule

So you may have noticed the photos in this dining room progress photo.  I finally got around to doing something with some of the photos from our European vacation.  This is a really simple project and I think it adds some variety instead of just doing frames.  I chose 4 of my favorite photos from Rome and ordered them in large format prints from Shutterfly.  I made sure to wait for a sale to get the best deal.


I chose prints of the Colosseum, the Trevi Fountain, and the Spanish Steps.

Other Supplies:
Blank canvases the same size as your prints
Black paint (I used acrylic paint which I already had on hand)
Several foam brushes
Mod Podge

The process was very simple.  I started by painting the sides of the canvases black and made sure to paint a little of the front and back too just to make sure no white would be showing.

Then I applied the Mod Podge to the front of the canvas and the backs of the prints with a foam brush.
Finally I placed the prints on the canvases and smoothed out any bubbles.  Then I hung them on the wall.  Piece of cake.  You could also cover the print itself with Mod Podge to create some texture but I opted not to do that.

My original plan was to hang the three color prints in the living room and the black and white Spanish Steps print in the dining room but once I hung the print in the dining room it looked really lonely and was too small for the wall space.
 So I decided to hang two more of the prints next to it and it looked much better.
I still have one more print that I am not sure what to do with yet but I'm sure I'll find a place for it eventually.

My second project was even simpler.  I am a runner and I am currently training for my third half marathon.  I like to follow a very specific training schedule and I usually make chart for each run I do.  I thought it would be fun to make a reusable training schedule for the exercise room.  I made a simple table in Microsoft Word and then printed it out.  I bought a really cute frame, trimmed the page to the dimensions of the page and then popped it in the frame.  I use a wet erase marker to write in my training schedule on the glass of the frame (you could use dry erase too but I am a teacher and have easy access to the wet erase markers and prefer them because I don't wipe them off as a write.  Darn left-handedness)  It was super simple and I think it is super cute!

Friday, July 5, 2013

A Colorful Entrance


I love the outside of our house.  The landscaping is absolutely gorgeous, the window boxes are adorable, and I love the gray metal siding.  But the front door left something to be desired.  Technically this door is a super heavy metal storm door.  We had some issues with it this Spring because the thing that makes the door shut slower was broken.  This door is heavy so when it closes quickly it gets stuck and is almost impossible to open from the outside.  Thankfully my husband bought a new part for it and it now works properly again but it was pretty boring to look at.  I especially hated that gold kick plate at the bottom.

So I decided it was time for a new bold paint color for the door.  Originally I wanted to paint the door a bright yellow a la the Petersiks of Young House Love.  But then I happened to be reading another diy blog that I like, IHeart Organizing, and saw that the lovely Jen had decided to paint her front door a lovely deep teal color.  I loved the color that she chose so much that I decided to put the same color on my front door.  Her house has gray siding too so I new that this color would look fantastic on my house as well.  The color is Behr Harbor and I absolutely love it.  I get giddy every time I see it.  Well enough talk, let's see some pictures!


Also, with the new color I am totally digging the gold kick plate now.  Teal and gold is a fabulous combo. 

I also thought I would include a little raised garden update with this post because the garden is looking dramatically different these days. This is what it looked like not even a month ago:

And it looks just slightly different now ;)

 Many of the cucumbers, zucchinis, and tomatoes have blooms now and I can't wait to be eating delicious home grown veggies!


Tuesday, July 2, 2013

Happy Anniversary

One year ago from Monday we spent our first day in our new house.  A lot has changed since our first days in this house and I thought I would take a moment to reflect on those changes and the changes that are planned for the future.

I will start with the dining room because I am calling this room done for now. Here is a reminder of what we started with.


And here is what it looks like today:

Projects accomplished: Painted walls and wainscoting, added a stencil pattern to the walls using a glossy over flat paint technique, purchased a dining room table on Craigslist, hung curtain rods and sewed curtains, made art for the room out of photos from our Europe trip (post coming soon).

Still to do: sew placemats, refinish table and chairs (or purchase new chairs)
Next up is the kitchen.

Here are some pictures of the changes I've made:


I don't have any true progress pics yet because I am in the midst of tiling the back splash.

Projects completed: painted walls, changed out switch plates, painted side door, made a faux roman shade with water color painted fabric that I made, made recipe art for the faux brick wall, mounted a spice rack on the faux brick wall.

Still to do: Install a tile back splash with lantern shaped tile (in process right now), change out cabinet hardware
Now onto the living room:


And some progress shots:


Projects completed: painted walls and trim, put up a chair rail, made over bookcases, sewed curtains

Still to do: Get a new TV stand, have an electrician install some sort of overhead lighting and an outlet by the piano, add more art to the walls

Onto the porch, my focus project of the summer

And some progress shots:

Projects completed: painted walls and trim and porch floor (after removing the carpet), hung curtain rod, made window seats out of Ikea shelving units, spray painted an outdoor rug.

Still to do: find/make more pillows for the window seating, find a trunk to use as coffee table (actually might already have this but it is at my father-in-laws house in Western ND so it might be awhile before I get it), make voile curtains, paint trim around front door, make/find art for wall by front door.

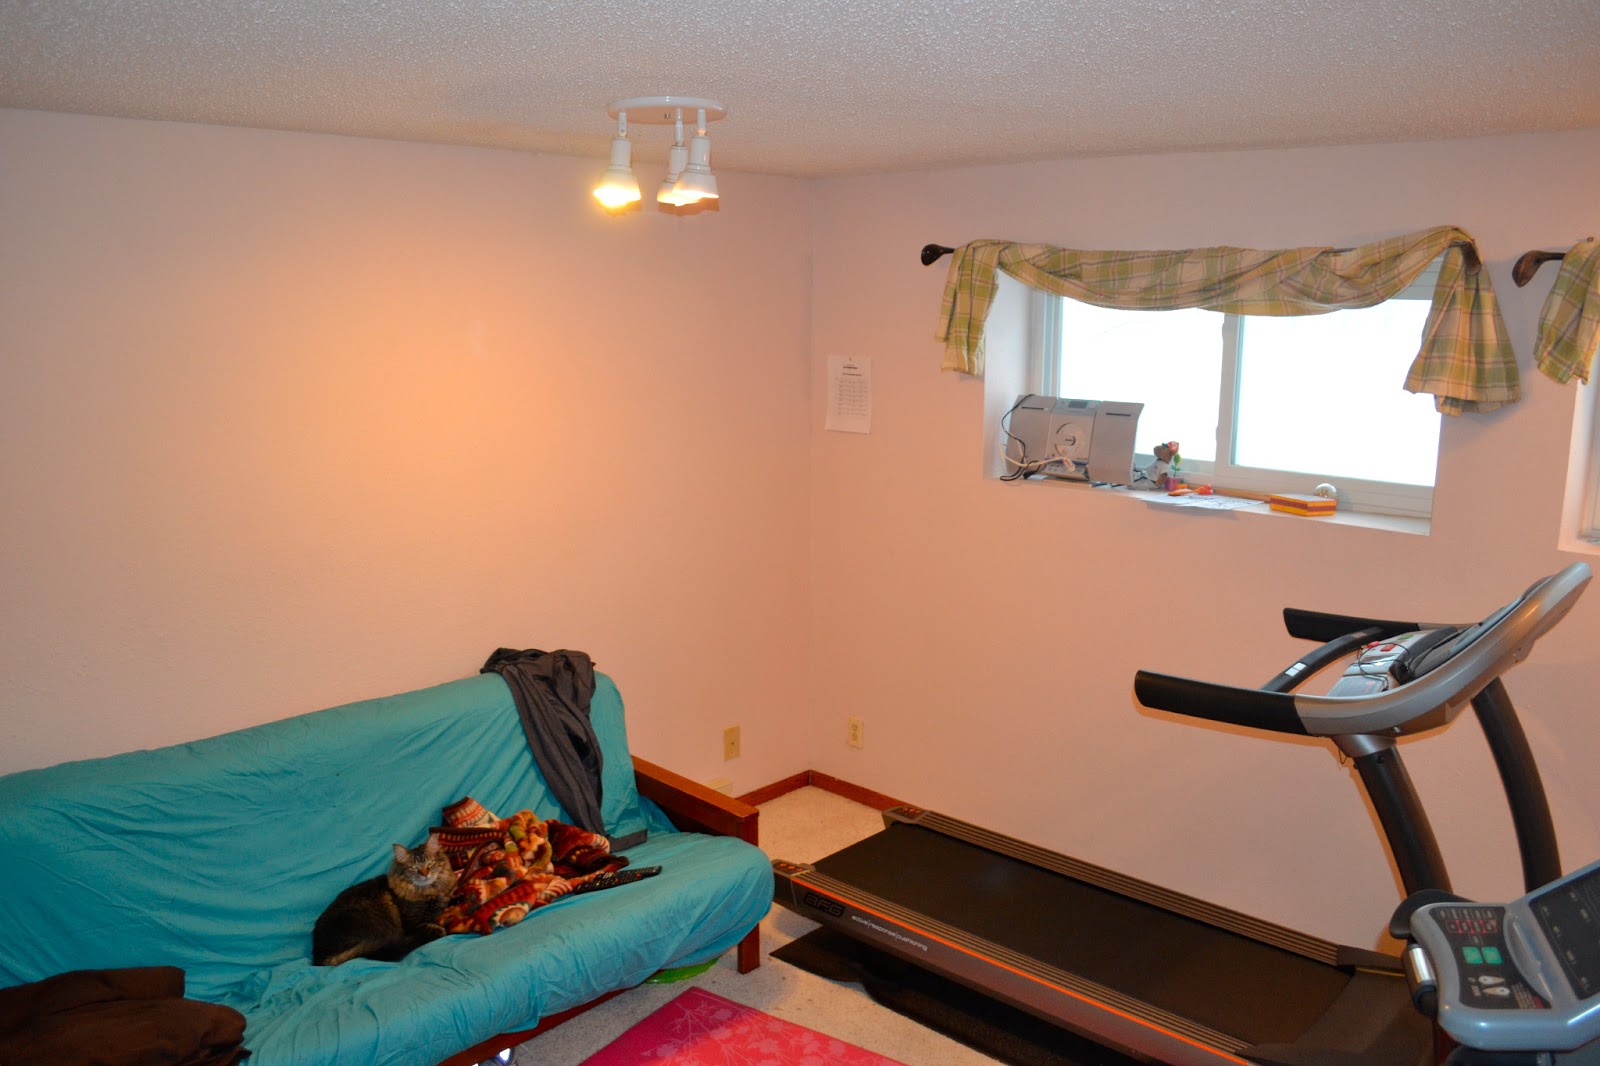
Next up, the bonus room.

This room was a pretty blank slate:

Projects completed: Add exercise equipment to room, mount a TV on the wall, mount medal display holders.

Still to do: make inspirational word art for walls, new window treatments

I will not be updating the office, master bedroom, or bathrooms in this post.  The master bathroom is pretty perfect the way it is.  Eventually I will add pics to the house tour of what it looks like with all the accessories in it.  The other three rooms have not changed much although I have huge plans for the master bedroom sometime this Fall or late Summer

Next up is the guest bedroom


And now


Projects completed: Painted walls, doors and trim and changed out outlet covers and switch plates

Okay so not much has happened in here but I have big plans for this room as well.  Most of them I can't share yet but my next big project after the tiling in the kitchen is done is to pull up the carpet and refinish the wood floors underneath.  I would also like to do that in the upstairs hallway and on the stairs.

Now for the outside:


Projects completed: Created a bird cage planter, made a raised vegetable garden with cinder blocks, painted the front door (There will be a post in the near future with pictures, don't worry!)

Still to: Someday a new patio, or pergola, or deck or combination, cut back on the number of hosta plants, plant hydrangeas and tulips

Well a lot of work has been done and there is still so much to do.  But I have definitely been enjoying the journey and I look forward to spending many years in this house.
Related Posts Plugin for WordPress, Blogger...